Page 4
With the blank gripped by the top I can proceed to turn to the final shape. I have full access to the bottom so I can turn it completely round or add a decorative point if I feel I may have bored the centerpiece mounting hole a bit too deep to allow making the bottom fully round. The intersecting holes were bored closer to this end of the blank so that I have better access between the chuck and the top of the ornament for the final cuts and sanding.
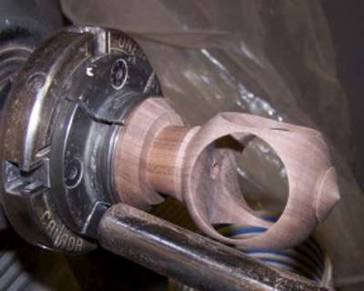
Photo #14: Ornament sanded
With the main body of the ornament sanded I can make the final cuts at the top that reduce the diameter of the supporting wood and carefully sand that area. Then I applied my beeswax/mineral oil finish and buffed it out before parting off.
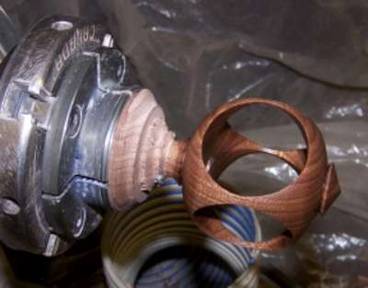
Photo #15: Ready for parting off
I usually use maple for the top finial and centerpiece, but I happened to have a scrap of white ash handy so I used it for this one. The blank started out 4” long and about ¾” square. I gripped one end in the chuck and used the tailstock for support while I roughed it down to round and cut a tenon on the end. I then mounted it by gripping the tenon in the chuck and completed the roughing out. I then turned a small finial with a ¼” tenon on the end of the piece and installed a screw eye for hanging.
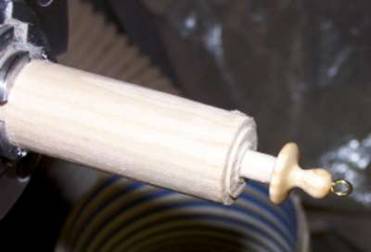
Photo #16: Top finial sanded and finished.
After parting off the top finial I turned a snowman with a ¼” tenon from the rest of the stock.
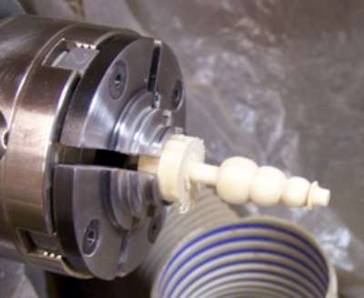
Photo #17: Snowman
After sanding the snowman I used a black marker to color the hat black and add the eyes, mouth and buttons. I was reminded why I usually use maple for this when there was a bit of bleeding of the ink in this coarser grained ash.

Photo #18: Ornament finished.