Cutting out an Octagon
There are several ways to lay out and cut octagons, but
this is the method I use. I start out
with a square blank, in this case 8/4 walnut.
I set a marking gauge to approximately half the width of the blank and
scribe a line from two opposite edges. Usually
an eyeball approximation will result in the lines being ½” or so apart. I then re-set the marking gauge to scribe a
line half way between the first two, and then scribe two more lines. These lines are usually 1/16” or less apart
because it is fairly easy to eyeball the mid point of a ½” gap. I then go ahead and scribe lines referenced
off all four edges. The intersection of
the four lines should define a square with sides 1/16” or less long. It is quite easy to set the point of a
compass in the centre of a square that small.

Photo 1: Centre point of blank found and marked
With the centre of the blank found I use a compass to draw
a circle that just touches all four sides of the square.
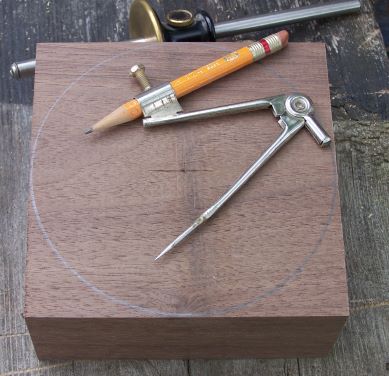
Photo 2: Draw circle
All four sides of a square are tangents of the largest
circle that can be drawn inside the square.
All eight sides of an octagon are tangents of the largest circle that
can be drawn inside the octagon. Since
the four sides of this square will become four of the sides of the finished
octagon it follows that the other four sides of the octagon will also be
tangents of this circle. That fact
makes it easy to lay out the other four sides with a combination square. In practice I simply lay out one side and
use a stop block on my mitre saw to ensure that all four cuts are the same.
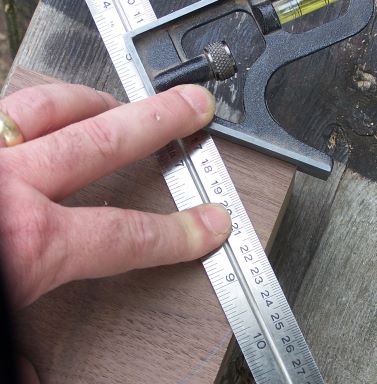
Photo 3: Draw tangent at 45 degrees
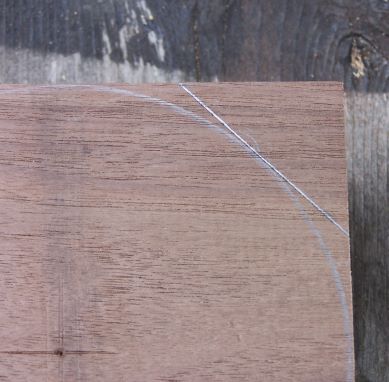
Photo 4: Tangent drawn in
I set up my
mitre saw with a zero clearance rear fence to better support the workpiece and
make it easy to line up my layout marks with the kerf cut in the fence in order
to set up the stop block. One important
point to keep in mind is that you need to use a stop block that extends far
enough out from the fence to bridge over the gap that will be there when you go
to cut the last corner off.
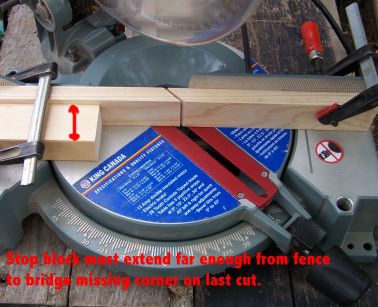
Photo 5: Mitre saw set-up
Now butt your
blank up to the stop block and fence and cut off the first corner.
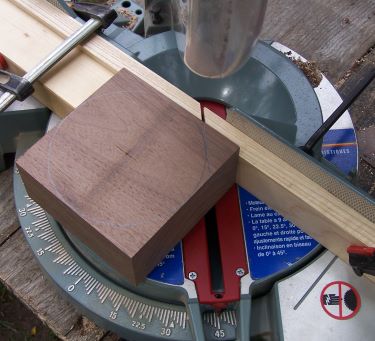
Photo 6: Ready for
first cut.
Once the
first corner is cut off you can rotate the piece clockwise to cut off the
second corner. Rotating clockwise will
keep a square corner against the stop block for the first three cuts.
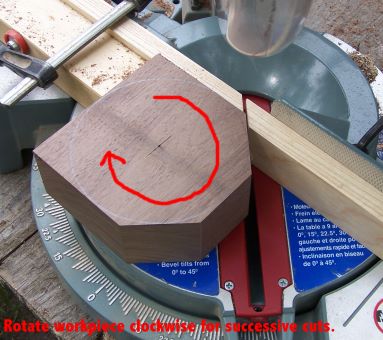
Photo 7: Second corner cut
Repeat for
the third corner.
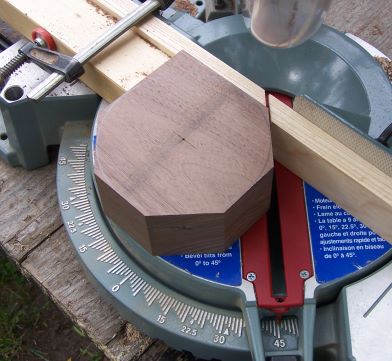
Photo 8: Third corner cut
On the final
cut you will have a gap where the first corner was cut off. Make sure the edge against the fence is
flush and the stop block is catching the other edge beyond the gap.

Photo 9: Final corner cut set-up
Once the last
cut is made you should have a relatively accurate octagonal blank. It may not be perfect to the thousandth of
an inch but should be close enough for all practical purposes.

Photo 10: Finished octagon
I would like to thank JimQ from the Woodturning Online forums for pointing out this easy way to lay out an octagon. It is much better and more accurate than the way I was using before.