Page 2
My first cuts are to “face
off” the bottom surface so that it is turning true. I then use a pair of dividers to lay out the chucking recess in
the bottom face. I turn the recess
about 3/16” deep.

Figure 6: Chucking recess prepared in potpourri bottom
Now that the recess is cut I
can hog off a lot of waste very quickly until the cherry section has been
turned round and shaped to please me. I
switch to heavy, thick scrapers to form the serpentine curve into the bottom
surface of the walnut layer. This is an
interrupted cut so you need to pay attention to the “ghost image” as the piece
turns and stop the lathe frequently to check your progress. I run the lathe at about 2000 rpm and use
light cuts with the scraper, holding the blade with my left hand just behind
the tool rest, thumb on top and forefinger riding on the back of the tool rest
to help gauge the depth of cut. It
sounds much more difficult than it really is.
When you are happy with the shape you are ready to sand.
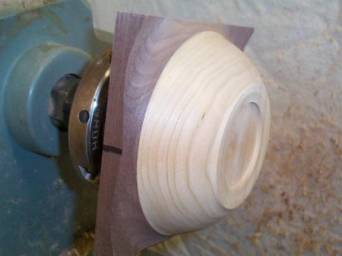
Figure 7: Potpourri bottom ready for sanding
I power sand with a 3” disk
mounted in a hand held electric drill and the lathe running. The disk mandrel has foam rubber with “hook
and loop” on the face of it and the sanding disks are flannel backed to adhere
to the “hook and loop”. I usually work
up through the grits from 120 to 400. I
use a 2” disk to sand the interior of the chucking recess and then stamp my
initials into the bottom.

Figure 8: Potpourri bottom sanded and ready for finish
Sanding to 400 grit leaves
the surface fairly shiny even before applying a finish. The finish “pops” the grain and has a nice
sheen to it.
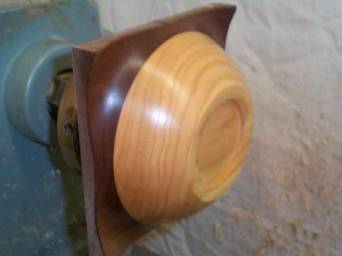
Figure 9: Finish applied and buffed out
The outside of the bottom is
now complete. The bottom is reversed
onto the expanding jaws of the 4-jaw scroll chuck to hollow the interior.
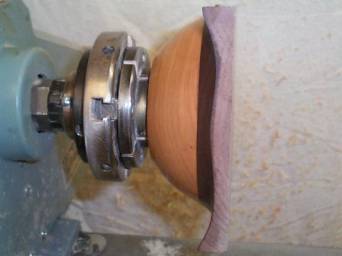
Figure 10: Potpourri bottom reversed for turning inside