Page 4
Removing a bit more material with the bench chisel let me pull out the rest of the nail. It appears to be a ring nail of the type used for flooring. Who knows when or why it was driven into the tree. The good news is that it looks like it was entirely contained within the area that I intend to be the cavity of the box so the only harm done is to the cutting edge of my gouge. What are the odds of that?
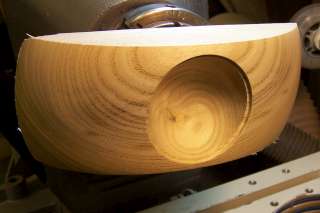
Anyway, I can now continue hollowing the box cavity and cutting a rabbet for the lid to seat in. With that done I sand the top surface of the box and the inside of the cavity.
Photo #13: Top of box done and sanded.
I reversed the box on the chuck again, gripping it by expanding the chuck jaws into the lid rebate. I can now start to shape the underside of the box. The key to doing a good job here is to not get too far ahead with the waste removal. I need to leave a good thickness of material in the middle of the arch until I have the extreme ends cut to the final thickness that I want.
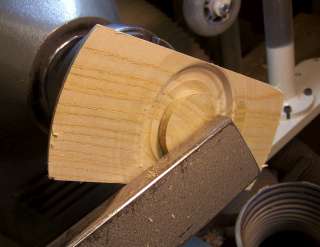

Photo #14: Box reversed again Photo #15: Forming the bottom