Page 5
In order to
turn the knob and lid as a unit I needed to re-mount it on the lathe. My jumbo jaws for the chuck are not really
suitable for this particular project since the rubber dogs stick out about 5/8”
and I wanted to be able to turn right out to the edge to blend the knob into
the curve of the top.
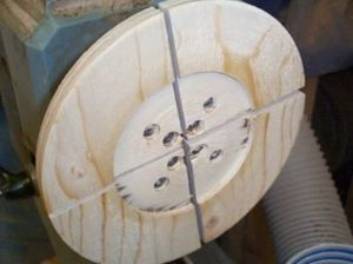
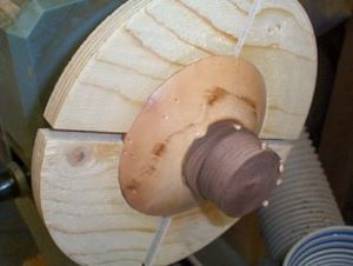
Photo #25: Plywood jaws Photo #26: Lid mounted
I chose to
make some chuck jaws out of plywood so that I could turn a shallow recess to
grip the lid by the rim. This also
allowed sizing the recess so as to get full contact around the rim and avoid
marring the edges. This is simply ¾”
fir plywood so it is unlikely that it would be hard enough to mar the maple
lid, but why take chances?
Addendum: If you choose
to make jaws similar to these please ensure that you use longer screws than the
ones that come with the chuck to mount them to ensure there is adequate material
under the screw head for support. A much better option is to use something
like the "Flat
Jaws" that are available for Oneway chucks to mount wooden jaw
faces. I am aware of one case where a turner was seriously injured when
his auxiliary jaws broke free while he was turning.
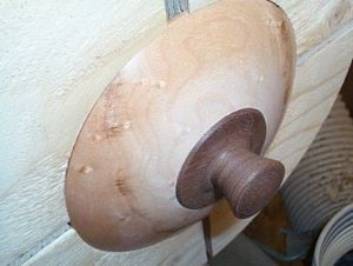
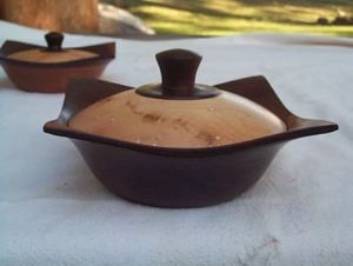
Photo #27: Knob turned Photo #28: Completed bowl
With the lid
securely mounted in the chuck I proceeded to turn the knob shape and blend it
in to the curve of the top. The knob
was then sanded and finished and the bowl is complete.

Photo #29: The original Rosewood and Lacewood bowl
This is a photo of the first lidded bowl I turned from the blank sent to me by my friend Ken Smith of O’Fallon, Missouri. It holds a special place in my collection and heart. Many thanks, Ken!