
Page 3
Now I have to deal with the chipped out foot and any other areas that have chipped out. It only took a couple of passes with my spokeshave on the end grain edges to clean them up, but the long grain edge that had the nasty chip required planing off about 1/8" to get a clean surface. That would have left two legs noticeably wider than the other two, so I planed a similar amount off the other long grain edge. A word of caution here: the area under the rim is undercut and hand planing the rim will leave the lower edge of the rim extremely sharp, especially on the long grain edges. Use a piece of 150 or 240 grit sandpaper to ease the sharp edge and fair out the curve if it needs it. (Fortunately I didn't get any blood on the wood. :) ) With the edges cleaned up I proceeded to power sand the bowl bottom and then shut the lathe off and hand sanded the underside of the legs.
Photo #13: Ready to clean up the edges Photo #14: Edges cleaned and bottom sanded.
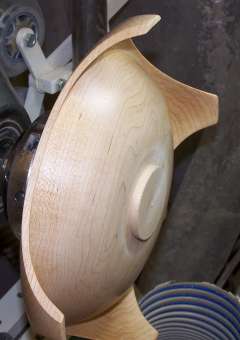
I now reversed the bowl and mounted it on the tenon. Hollowing the bowl is pretty much the same as hollowing any bowl.


Photo #15: Bowl reversed Photo #16: Beginning to hollow.
I left a flat area on the face of the bowl just inside the rim because I decided I wanted to make this a lidded bowl and I wanted any movement that might occur as the bowl was hollowed to happen before I cut the rabbet for the lid to seat in. I turned and sanded the inside of the bowl completely before cutting the rabbet. I then removed the bowl from the lathe to begin work on the lid. Since I have more than one chuck I was afforded the luxury of leaving the bowl attached to the chuck while I made the lid.

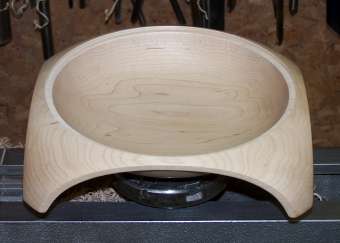
Photo #17: Bowl inside sanded Photo #18: Rabbet cut and bowl removed from lathe