Page 5
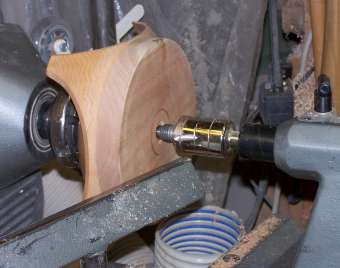
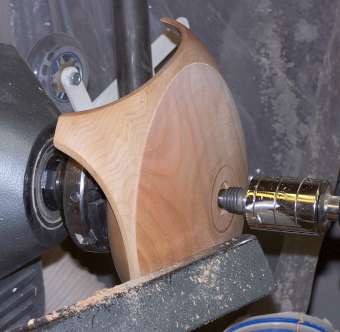
No, I am not quite crazy enough to rely on a friction fit on a 1/8" tenon to support a piece this size while turning it. :) I brought the tailstock up and used it to apply pressure to the lid to hold it in position while I turned the top surface. I wanted the top surface of the lid to be flush in the bowl rabbet and simply continue the curve of the legs. I also intend to glue a maple disk to the top of the lid and shape it into a handle for the lid, so I did not need to get too close to the tail center while turning and sanding.
Photo #25: Tailstock support for lid Photo #26: Lid turned and sanded
I will be taping the lid in place while I turn a flat in the center for gluing on the maple disk, so I applied a coat of my beeswax/mineral oil to prevent a bunch of adhesive residue from sticking to the bare wood. Due to my absolutely phenomenal organizational skills I was unable to find even one of the half dozen or so rolls of masking tape that I am sure I have around here, so I used this black cloth tape which I normally use for repairing book bindings that have split. As it turned out that may have been a blessing in disguise.
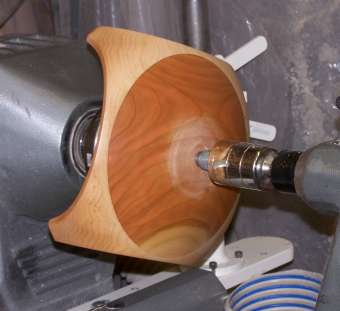
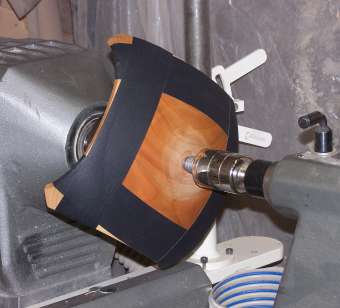
Photo #27: Finish applied Photo #28: Lid taped in place
I am afraid I neglected taking any pictures of a few steps here. With the lid taped in place I moved the tailstock back and turned a flat area in the center of the lid. I then removed the piece, chuck and all, from the lathe. I returned to my other chuck with the #1 jaws and turned a disk of maple to use as a handle for the lid. I put the bowl back on to the lathe and glued the maple disk on to the center of the lid. Once the glue had set up I started to turn a tenon on the handle disk to allow me to mount it to finish turning the underside of the lid.
At that point the tenon on the bottom of the bowl that was supporting the entire assembly broke and the bowl wound up on the floor. I can only guess as to the cause of the failure of the tenon. It may have had something to do with the number of times I had had the piece on and off the lathe, but the chuck remained in place the entire time and I don't remember bumping it or doing anything that might have weakened the tenon.
My best guess at this point is that since the board I cut the original blank from was stored in an unheated shed the failure may have been the result of a wood movement issue. The bowl had remained mounted in the chuck right from the time I originally mounted it to hollow the inside. It had sat in my heated shop overnight while I was working on the lid blank, so it may have been trying to move and the chuck wouldn't let it, so it started to split. On the second day I was using tailstock support when I had it mounted for turning the lid, so the crack was not stressed. When I removed the tailstock support in order to flatten the area in the center of the lid I was using very light shear scraping cuts which would not have stressed the tenon very much. When I started cutting the tenon on the handle disk I did not feel that I was cutting aggressively, but it was apparently enough stress to shear the tenon off the bowl bottom. If I had returned to using the tailstock support the tenon would very likely have stayed on.
However, sometimes miracles do happen. The bowl survived its trip to the floor entirely unscathed. I could not believe it when I picked it up and checked it over. I had had the tool rest oriented across the end of the piece so it (and ME!!!) was out of the line of fire when the tenon broke. The cutting resistance of the tool edge must have given the piece just enough "lift" that it cleared the lathe bed on its voyage. The cloth tape I was using to hold the lid in place may have provided more protection to the edges than masking tape would have. And the ankle deep layer of shavings on the floor that cushioned its landing may have had something to do with it, as well. :)
Whatever the causes and reasons, I was extremely grateful not to have to scrap the project. Instead all I had to do was to go to "Plan B" for turning a tenon on the end of the handle. I mounted my smaller vacuum chuck on the headstock to use as a friction drive and this time I brought up the tailstock both to support the lid and center it, using the dimple that was still there from the forstner bit I had used to bore the mounting recess in the maple disk.
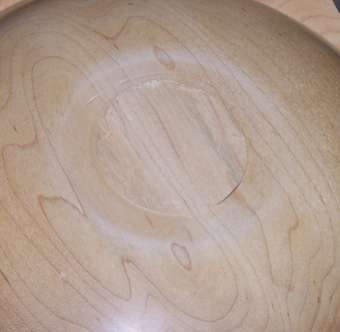
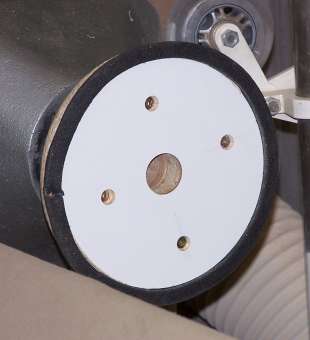
Photo #29: Tenon sheared off bowl bottom Photo #30: Friction chuck mounted.